Summary of Configuration Information and Changes |
Modem Login Page: Modem Administrator User Name: Modem Administrator Password: |
Where to go in Menu: |
What to change: |
1. Connect to your modem using a wired Ethernet cable or join your Wireless network.
2. Open an Internet browser on your computer and connect to the modem by typing 192.168.1.1 in the address bar.
3. Click on the Manage Gateway(Advanced)” Log in to the Administrative Account:
- Username: admin
- Password: Your DSL password (Default is admin)
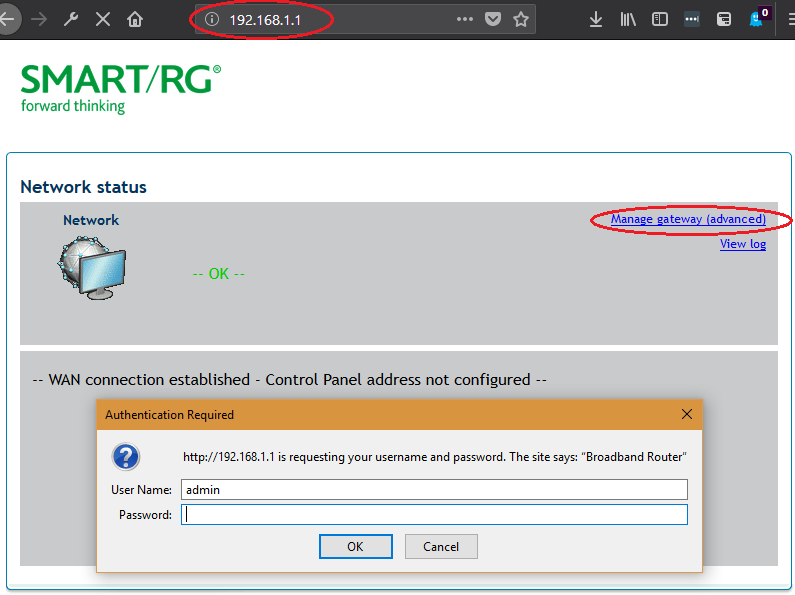 4. From the Advanced Settings page, navigate to the Advanced Setup > DNS > DNS Server option on the left.
5. Change the settings to “Use the following Static DNS IP address:”. We recommend using the cloudflare DNS servers at:
- Primary DNS Server: 1.1.1.1
- Secondary DNS Server: 1.0.0.1
6. Change the settings for “Use the following Static IPv6 DNS IP address:”. We recommend using the cloudflare DNS servers at:
- Primary DNS Server: 2606:4700:4700::1111
- Secondary DNS Server: 2606:4700:4700::1001
7. Click Apply/Save at the bottom of the page. 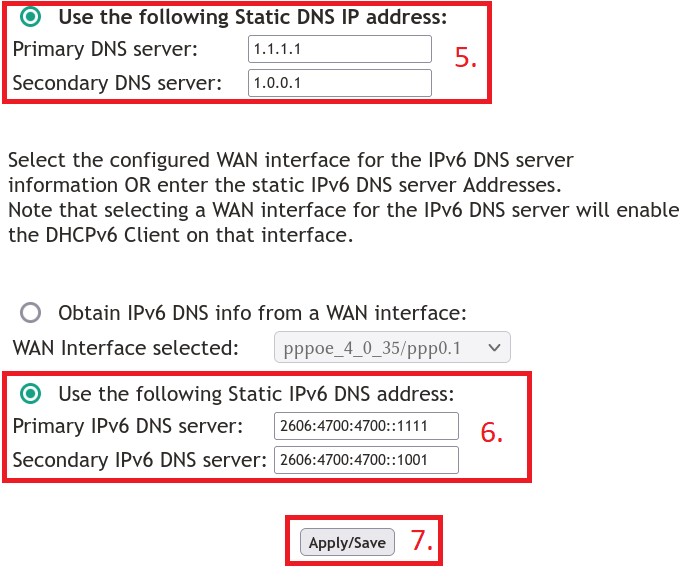 The following steps are only available on Firmware version 2.6.2.6 or later
8. Navigate to the Advance Setup > LAN 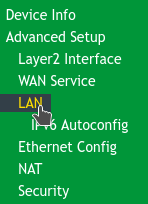 9. Change the settings for the Static DNS Servers (optional). We recommend using the cloudflare DNS servers at:
- Primary DNS Server: 1.1.1.1
- Secondary DNS Server: 1.0.0.1
 10. Click Apply/Save at the botton of the page.
¶ See Also
- Modem Configuration - for a complete list of instructions for all NCF modems